Valentines Snacks Mini Puff Pastries
Highlighted under: Sweet Ideas
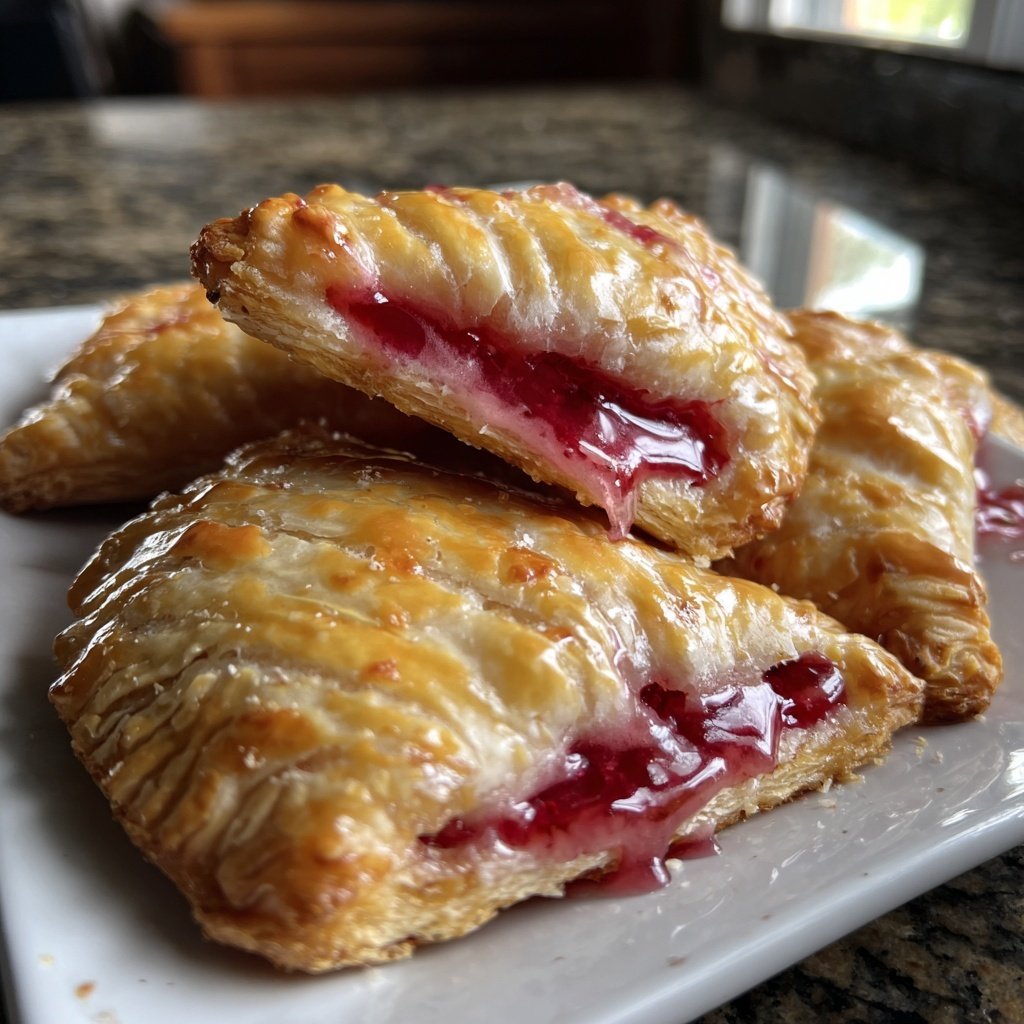
I absolutely love making mini puff pastries for any occasion, especially Valentine's Day! The excitement of creating these delicate pastries filled with sweet or savory fillings is unmatched. Each bite is a perfect combination of flaky texture and rich flavor that leaves my guests wanting more. Plus, they are so versatile; you can customize them with a variety of fillings to suit your taste. I can't wait to share this recipe that always impresses during a romantic evening or a festive gathering.
When I first made these mini puff pastries, I was amazed at how easy they were and how fancy they looked! I used store-bought puff pastry to save time, rolling it out to get the perfect thickness. The key is to ensure the butter is cold, which creates those beautiful flaky layers we all love. I filled them with a mixture of cream cheese and herbs for the savory option and a delicious chocolate-hazelnut spread for the sweet version.
One detail I've learned is to brush the pastries with an egg wash before baking—the golden color it gives is simply beautiful. Plus, if you sprinkle a little sugar on top of the sweet pastries, it creates a lovely crunch. These puffs not only look stunning, but they also taste divine, making them a perfect treat for any celebration!

Why You'll Love These Pastries
- Flaky and buttery texture that melts in your mouth
- Versatile filling options to suit any taste preference
- Perfect for romantic evenings or festive gatherings
The Versatility of Fillings
One of the most exciting aspects of mini puff pastries is their adaptability to various fillings. Whether you're in the mood for something sweet or savory, you can customize these pastries to fit your desires. If you want a fruity twist, consider adding some sliced strawberries or raspberries to the chocolate-hazelnut filling. Savory options can be strengthened with a pinch of garlic powder or even a dollop of pesto mixed into the cream cheese for a burst of flavor.
Additionally, you can experiment with different cheeses for the savory filling. Goat cheese adds a tangy element that pairs beautifully with fresh herbs. Don't hesitate to mix textures; adding some chopped nuts or even cooked bacon bits can enhance the overall experience, providing a delightful crunch that complements the flakiness of the pastry.
Mastering the Perfect Puff Pastry
Achieving that impeccable flakiness in your puff pastry relies heavily on temperature management. Keeping the pastry cold is essential; warmth can make it harder to achieve those airy layers. If you're working in a warm kitchen, consider putting your rolled pastry in the fridge for about 10-15 minutes before cutting. This ensures that the fat remains solid, allowing for better puffing during baking.
Another key step is the egg wash. Brushing the pastries with a beaten egg before baking not only enhances their golden color but also adds a beautiful sheen. Make sure to cover the entire surface without letting the egg wash drip down the sides, as this can interfere with the puffing process. If you're looking for a vegan alternative, a mixture of almond milk and a bit of cornstarch can provide a similar effect.
Ingredients
Gather these ingredients before starting your mini puff pastries:
For the Pastry
- 1 sheet of puff pastry, thawed
- 1 egg, beaten (for egg wash)
Sweet Filling Option
- 1/2 cup chocolate-hazelnut spread
- 1 tablespoon powdered sugar (optional, for dusting)
Savory Filling Option
- 1/2 cup cream cheese, softened
- 1 tablespoon fresh herbs (like chives or parsley), chopped
- Salt and pepper, to taste
With these ingredients in hand, you're ready to whip up some delightful treats!
Instructions
Follow these steps to make your mini puff pastries:
Prepare the Puff Pastry
Preheat your oven to 400°F (200°C) and roll out the thawed puff pastry on a lightly floured surface. Cut it into small squares, about 3x3 inches.
Add the Filling
Place a teaspoon of your chosen filling (sweet or savory) in the center of each pastry square. Be careful not to overfill.
Seal the Pastries
Fold the pastry over to create a triangle or rectangle, depending on your shape preference. Press the edges with a fork to seal them tightly.
Brush and Bake
Brush the tops of the pastries with the beaten egg. Transfer to a baking sheet lined with parchment paper and bake for 15 minutes, or until golden brown.
Cool and Serve
Let the pastries cool for a few minutes before serving. If using a sweet filling, dust with powdered sugar before presentation.
Enjoy your delicious mini puff pastries—perfect for any occasion!
Pro Tips
- Experiment with different fillings like fruit preserves or savory meats to find your favorite combination!
Storing and Reheating
If you find yourself with leftover mini puff pastries, you can store them in an airtight container at room temperature for up to two days. However, for longer storage, consider freezing them before baking. Once assembled and sealed, place the pastries on a baking sheet lined with parchment paper and freeze until solid. Then, transfer them to a zip-top bag. They can be kept this way for up to a month. This allows you to bake them fresh whenever you're in the mood!
When it's time to enjoy your frozen pastries, there's no need to thaw them first. Simply bake them straight from the freezer, adding an extra 5-10 minutes to the baking time. This method ensures they remain flaky and delicious, mimicking the freshly baked texture you love.
Adjusting for Dietary Needs
Making these mini puff pastries vegan or gluten-free is entirely possible with a few swaps. For a gluten-free option, look for ready-made puff pastry made with alternative flours or blend your own using a mix of rice flour, almond flour, and xanthan gum. Ensure that all your fillings are gluten-free as well—some processed spreads may contain gluten.
If you're catering to a vegan diet, you can substitute the egg wash with a mixture of plant-based milk and maple syrup to achieve a similar gloss. For the fillings, replace cream cheese with a vegan alternative, or blend tofu with nutritional yeast, lemon juice, and herbs to recreate that creamy texture, making sure to season well to enhance the flavors.
Questions About Recipes
→ Can I make the pastry ahead of time?
Yes! You can prepare the pastries and freeze them before baking. Just add a few extra minutes to the baking time when you're ready to eat them.
→ What can I serve with these pastries?
They pair well with a side salad or are great as appetizers at gatherings. For a sweet option, enjoy them with a scoop of ice cream.
→ Can I use homemade puff pastry?
Absolutely! If you have the time, homemade puff pastry will make these even more delicious.
→ Are there gluten-free options?
Yes! Look for gluten-free puff pastry sheets available at many supermarkets.
Valentines Snacks Mini Puff Pastries
Created by: Marigold Pearson
Recipe Type: Sweet Ideas
Skill Level: Beginner
Final Quantity: 12 servings
What You'll Need
For the Pastry
- 1 sheet of puff pastry, thawed
- 1 egg, beaten (for egg wash)
Sweet Filling Option
- 1/2 cup chocolate-hazelnut spread
- 1 tablespoon powdered sugar (optional, for dusting)
Savory Filling Option
- 1/2 cup cream cheese, softened
- 1 tablespoon fresh herbs (like chives or parsley), chopped
- Salt and pepper, to taste
How-To Steps
Preheat your oven to 400°F (200°C) and roll out the thawed puff pastry on a lightly floured surface. Cut it into small squares, about 3x3 inches.
Place a teaspoon of your chosen filling (sweet or savory) in the center of each pastry square. Be careful not to overfill.
Fold the pastry over to create a triangle or rectangle, depending on your shape preference. Press the edges with a fork to seal them tightly.
Brush the tops of the pastries with the beaten egg. Transfer to a baking sheet lined with parchment paper and bake for 15 minutes, or until golden brown.
Let the pastries cool for a few minutes before serving. If using a sweet filling, dust with powdered sugar before presentation.
Extra Tips
- Experiment with different fillings like fruit preserves or savory meats to find your favorite combination!
Nutritional Breakdown (Per Serving)
- Calories: 220 kcal
- Total Fat: 12g
- Saturated Fat: 5g
- Cholesterol: 45mg
- Sodium: 150mg
- Total Carbohydrates: 22g
- Dietary Fiber: 1g
- Sugars: 5g
- Protein: 3g